
Tasco Telescope Manual: A Comprehensive Guide (Updated 12/10/2025)
Welcome! This manual provides essential guidance for Tasco telescope owners, especially those, like you, receiving a gift.
Bright environments can hinder viewing, but this guide will help maximize your experience.
Today’s date is 12/10/2025, and we’ll cover everything from assembly to celestial navigation.
Tasco has a rich history in optical products, providing telescopes for both beginners and enthusiasts for decades. Receiving a telescope as a gift, like many do during the holiday season – in this case, Christmas – is a fantastic starting point for exploring the universe. However, initial setup and understanding are crucial for a rewarding experience. Many new telescope owners find themselves initially overwhelmed, particularly when faced with light pollution, as reported by a recent user.
This manual aims to demystify the process, guiding you through each step from unboxing to observing. We acknowledge the challenges presented by bright skies, and will offer strategies to mitigate their impact. Tasco telescopes are designed for accessibility, offering a relatively affordable entry point into astronomy. Understanding your telescope’s capabilities, and limitations, is key to enjoying the wonders of the night sky. We will cover magnification, aperture, and the importance of selecting the correct eyepieces. This guide is updated as of December 10th, 2025, reflecting the latest best practices and troubleshooting advice.
Understanding Telescope Components
A Tasco telescope, regardless of model, comprises several key components working in harmony. The optical tube houses the primary optics – lenses or mirrors – responsible for gathering and focusing light. The objective lens (in refracting telescopes) or primary mirror (in reflecting telescopes) dictates the telescope’s aperture, a critical factor in light-gathering ability.
Eyepieces magnify the image formed by the objective, and are interchangeable to provide varying levels of magnification. The mount supports the optical tube and allows for smooth tracking of celestial objects. Common mount types include Alt-Azimuth and Equatorial, each with unique advantages. A finder scope assists in locating objects, providing a wide-field view.
Additional components may include a diagonal (for more comfortable viewing angles), and various accessories to enhance your observing experience. Understanding how each component contributes to the overall performance is essential, especially when dealing with challenges like light pollution, which can diminish visibility. Knowing these parts will help you troubleshoot issues and maximize your viewing potential.
Assembling Your Tasco Telescope
Carefully unpack all components and verify against the parts list included with your specific Tasco model. Assembly typically begins with attaching the tripod legs, ensuring they are securely fastened and provide a stable base. Next, mount the telescope mount to the tripod head, tightening the securing screws firmly but not excessively.
Attach the optical tube to the mount, utilizing the tube rings or cradle provided. Ensure the tube is balanced within the mount for smooth movement. Install the finder scope, aligning it with the main telescope – this is crucial for accurate object location. Finally, insert an eyepiece into the focuser, securing it with the set screw.
Double-check all connections before use. Refer to the detailed diagrams in your model-specific manual for precise instructions. Remember, a stable and properly assembled telescope is fundamental for enjoyable and successful observing, even when contending with bright skies. Take your time and avoid forcing any parts during assembly.
Mount Types: Alt-Azimuth vs. Equatorial

Tasco telescopes utilize two primary mount types: Alt-Azimuth and Equatorial. Alt-Azimuth mounts are simpler to use, moving the telescope vertically (altitude) and horizontally (azimuth). They are intuitive for beginners and require minimal setup, making them ideal for casual observing, particularly when light pollution is a concern.

Equatorial mounts, however, are designed to counteract Earth’s rotation. They have one axis aligned with the Earth’s rotational axis, allowing for easier tracking of celestial objects as they move across the sky. While more complex to initially align, equatorial mounts are essential for astrophotography and prolonged observation.
Your Tasco model will specify which mount type it features. Understanding the differences is key to maximizing your observing experience. Alt-Azimuth mounts are great for quick views, while Equatorial mounts excel at following objects. Consider your observing goals when choosing or learning to use your mount effectively.
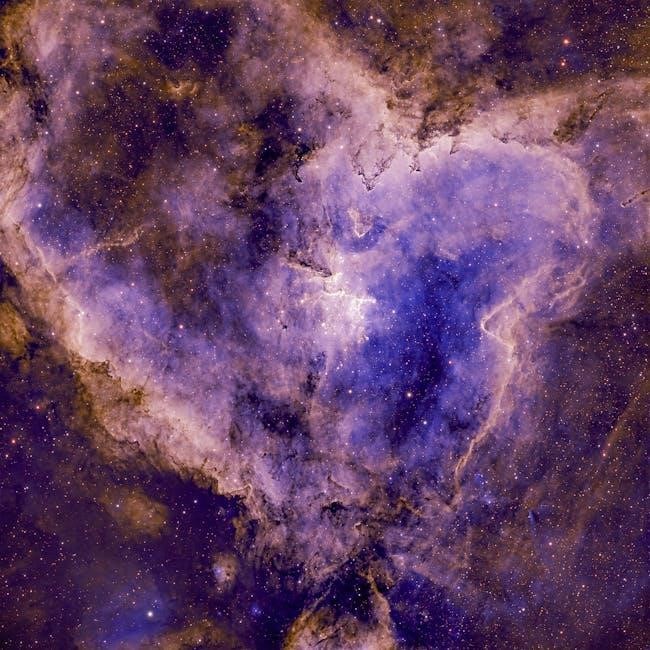
Finding Your Way Around the Night Sky
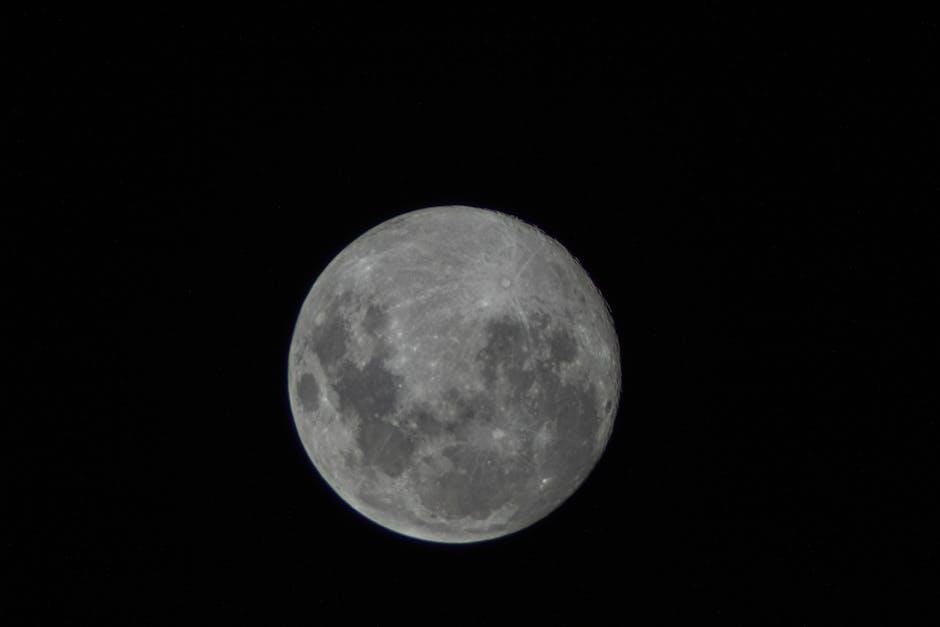
Successfully navigating the night sky with your Tasco telescope begins with familiarization. Start with the brightest and most easily identifiable objects – the Moon, planets like Venus and Mars, and bright stars like Sirius or Betelgeuse. Utilize star charts or planetarium apps on your smartphone; these are invaluable tools for beginners.
Learn to recognize constellations. These patterns of stars serve as landmarks, helping you locate fainter objects. Begin with well-known constellations like Orion, Ursa Major (the Big Dipper), and Cassiopeia. Remember that the night sky changes throughout the year as Earth orbits the Sun.
Due to light pollution, as mentioned by a user, focusing on brighter targets initially is crucial. Practice using your telescope’s finder scope to accurately point towards desired objects. Patience is key; allow your eyes to adjust to the darkness for optimal viewing.
Understanding Magnification and Aperture
Two key specifications define a telescope’s performance: magnification and aperture. Magnification, often advertised prominently, is simply how much larger an object appears. It’s calculated by dividing the telescope’s focal length by the eyepiece’s focal length. However, higher magnification isn’t always better.
Aperture, the diameter of the telescope’s main lens or mirror, is far more critical. Aperture determines light-gathering ability and resolving power – the ability to distinguish fine details. A larger aperture gathers more light, revealing fainter objects and sharper images.
A user noted difficulty seeing much due to brightness, highlighting the importance of aperture in overcoming light pollution. While magnification can be increased with different eyepieces, exceeding the telescope’s useful magnification (determined by its aperture) results in a dim, blurry image. Prioritize aperture for a superior viewing experience.
Choosing the Right Eyepiece
Eyepieces are interchangeable lenses that determine the telescope’s magnification. They are typically labeled with their focal length in millimeters (mm). A shorter focal length eyepiece yields higher magnification, while a longer focal length provides lower magnification and a wider field of view.
Starting with a low-power eyepiece (longer focal length, e.g., 25mm) is crucial for locating objects. This provides a bright, wide view, making it easier to center the object. Once centered, you can then switch to higher-power eyepieces (shorter focal length, e.g., 10mm) for closer inspection.
Remember, as previously discussed, exceeding the telescope’s useful magnification will result in a degraded image. Consider a range of eyepieces to suit different observing conditions and targets. The user’s experience with brightness suggests starting with lower power to gather as much light as possible initially.
Collimation: Maintaining Optical Alignment
Collimation refers to the precise alignment of the telescope’s optical elements – primarily the mirrors in reflector telescopes. Proper collimation is vital for achieving sharp, clear images. Even slight misalignment can significantly degrade image quality, resulting in blurry or distorted views.
While some Tasco telescopes may come pre-collimated, transportation and handling can cause misalignment over time; Regularly checking and adjusting collimation is therefore recommended, especially after moving the telescope.

Collimation typically involves adjusting screws on the telescope’s mirror cell. Specific procedures vary depending on the telescope model; consult your model-specific manual (see section 15) for detailed instructions. A Cheshire eyepiece or laser collimator can aid in this process, providing visual cues for accurate alignment. Maintaining proper collimation ensures optimal performance, particularly important when observing in areas with light pollution, where maximizing light gathering is key.
Dealing with Light Pollution
Light pollution – excessive artificial light – is a significant challenge for amateur astronomers. As noted by many new telescope owners, urban and suburban skies often appear too bright for detailed observation. This scattered light washes out faint celestial objects, reducing contrast and visibility.
Several strategies can mitigate the effects of light pollution. Firstly, choose observing locations away from city lights. Even a short drive to a darker site can dramatically improve viewing conditions. Secondly, utilize light pollution filters. These filters selectively block wavelengths of light emitted by common artificial sources, enhancing contrast.
Additionally, allow your eyes to fully dark-adapt – this takes approximately 30 minutes. Avoid looking at bright lights during this period. Finally, consider observing targets higher in the sky, as they are less affected by ground-level light pollution. Maximizing aperture and using higher magnification can also help pull faint details from the background glow, but these are less effective without darker skies.
Locating Celestial Objects
Successfully locating celestial objects requires a combination of star charts, planetarium software, and a systematic approach. Begin with bright, easily identifiable objects like the Moon, planets (Venus, Mars, Jupiter, Saturn), and bright stars. Familiarize yourself with constellations – these serve as landmarks in the night sky.
Star charts, either physical or digital, depict the positions of stars and deep-sky objects. Learn to read these charts and correlate them with what you see through your telescope’s finder scope. Planetarium software can simulate the night sky from your location, showing you the positions of objects at any given time.

Start with low magnification to locate your target, then gradually increase magnification for detailed viewing. Utilize the “star hopping” technique – moving from a bright star to a fainter object using your telescope’s movements. Patience is key; locating faint objects takes practice. Remember to account for the Earth’s rotation, as objects will appear to drift over time.
Troubleshooting Common Issues
Experiencing difficulties? Several common issues can arise with Tasco telescopes. Fuzzy images often stem from poor collimation (alignment of optical components – addressed in a separate section) or atmospheric turbulence (“seeing”). If the image is unstable, ensure the telescope is on a stable surface and allow it to cool down to ambient temperature.
Difficulty locating objects can be frustrating. Double-check your alignment procedure and ensure the finder scope is accurately aligned with the main telescope. If you’re struggling with light pollution, consider observing from a darker location or using filters.

Loose screws or wobbly parts indicate a need for tightening. Never force anything! If the telescope won’t focus, verify the eyepiece is fully inserted and try adjusting the focus knob slowly. If problems persist, consult the Tasco website for FAQs or contact customer support. Remember, a little patience and methodical checking can resolve most issues.
Tasco Telescope Maintenance and Care
Protecting your investment ensures years of enjoyable observing. Regularly dust the telescope’s optics – the lens or mirror – with a soft, lint-free cloth. Avoid harsh cleaning solutions; a gentle brush is often sufficient. Store your Tasco telescope in a dry, dust-free environment, ideally in its original packaging or a protective case.
Periodically check and tighten all screws and bolts, but avoid over-tightening. Lubricate moving parts, like the focus knobs and mount adjustments, with a small amount of silicone grease. Inspect the tripod legs for stability and ensure they are securely locked.

Avoid exposing the telescope to extreme temperatures or humidity. When transporting, secure all components to prevent damage. Remember, proper care not only extends the life of your telescope but also maintains optimal optical performance, allowing you to continue exploring the wonders of the night sky for years to come.
Recommended Accessories for Tasco Telescopes
Enhance your observing experience with a few key accessories. Considering light pollution impacts viewing, a light pollution filter can dramatically improve contrast, especially in urban areas. Different eyepieces offer varying magnifications, expanding your observational range – a kit with multiple focal lengths is highly recommended.
A red-dot finder simplifies locating objects, a crucial aid for beginners. For astrophotography, even basic smartphone adapters can capture stunning images of the Moon and planets. A barlow lens effectively doubles or triples the magnification of your existing eyepieces, providing greater versatility.
Comfort is key during long observing sessions; a comfortable observing chair is a worthwhile investment. Finally, a star chart or planetarium software will greatly assist in identifying celestial objects. These additions will unlock the full potential of your Tasco telescope and deepen your connection with the cosmos.
Resources for Further Learning
Expand your astronomical knowledge beyond this manual with a wealth of available resources. Websites like Sky & Telescope (skyandtelescope.org) and Space.com (space.com) offer current news, observing guides, and in-depth articles. Numerous astronomy clubs exist locally and nationally, providing opportunities for group viewing sessions and expert advice.
Planetarium software, such as Stellarium (stellarium.org – free and open-source), allows you to simulate the night sky from any location and time. Books dedicated to amateur astronomy, focusing on beginner techniques and object identification, are invaluable companions. YouTube channels dedicated to astronomy offer visual tutorials and observing tips.
Don’t overlook the power of online forums and communities where you can connect with fellow enthusiasts, ask questions, and share your experiences. Remember, continuous learning is key to unlocking the wonders of the universe with your Tasco telescope. Embrace these resources and enjoy the journey!
Tasco Telescope Model Specific Manuals (Where to Find)
Locating the precise manual for your specific Tasco telescope model is crucial for optimal performance. While this comprehensive guide covers general principles, model-specific details are essential. The primary resource is the official Tasco website (tasco.com), where a dedicated support section hosts downloadable manuals.
If the Tasco website doesn’t have your model, explore manualsLib.com and manualsonline.com – extensive online archives of user manuals. Searching by model number (usually found on the telescope’s tube or packaging) yields the most accurate results. Consider contacting Tasco customer support directly via their website or phone; they can often provide a digital copy.
Furthermore, online astronomy forums often have threads where users share links to older or less common manuals. Remember to verify the manual’s compatibility with your exact model number before relying on its instructions. A correct manual ensures safe and effective telescope operation.